


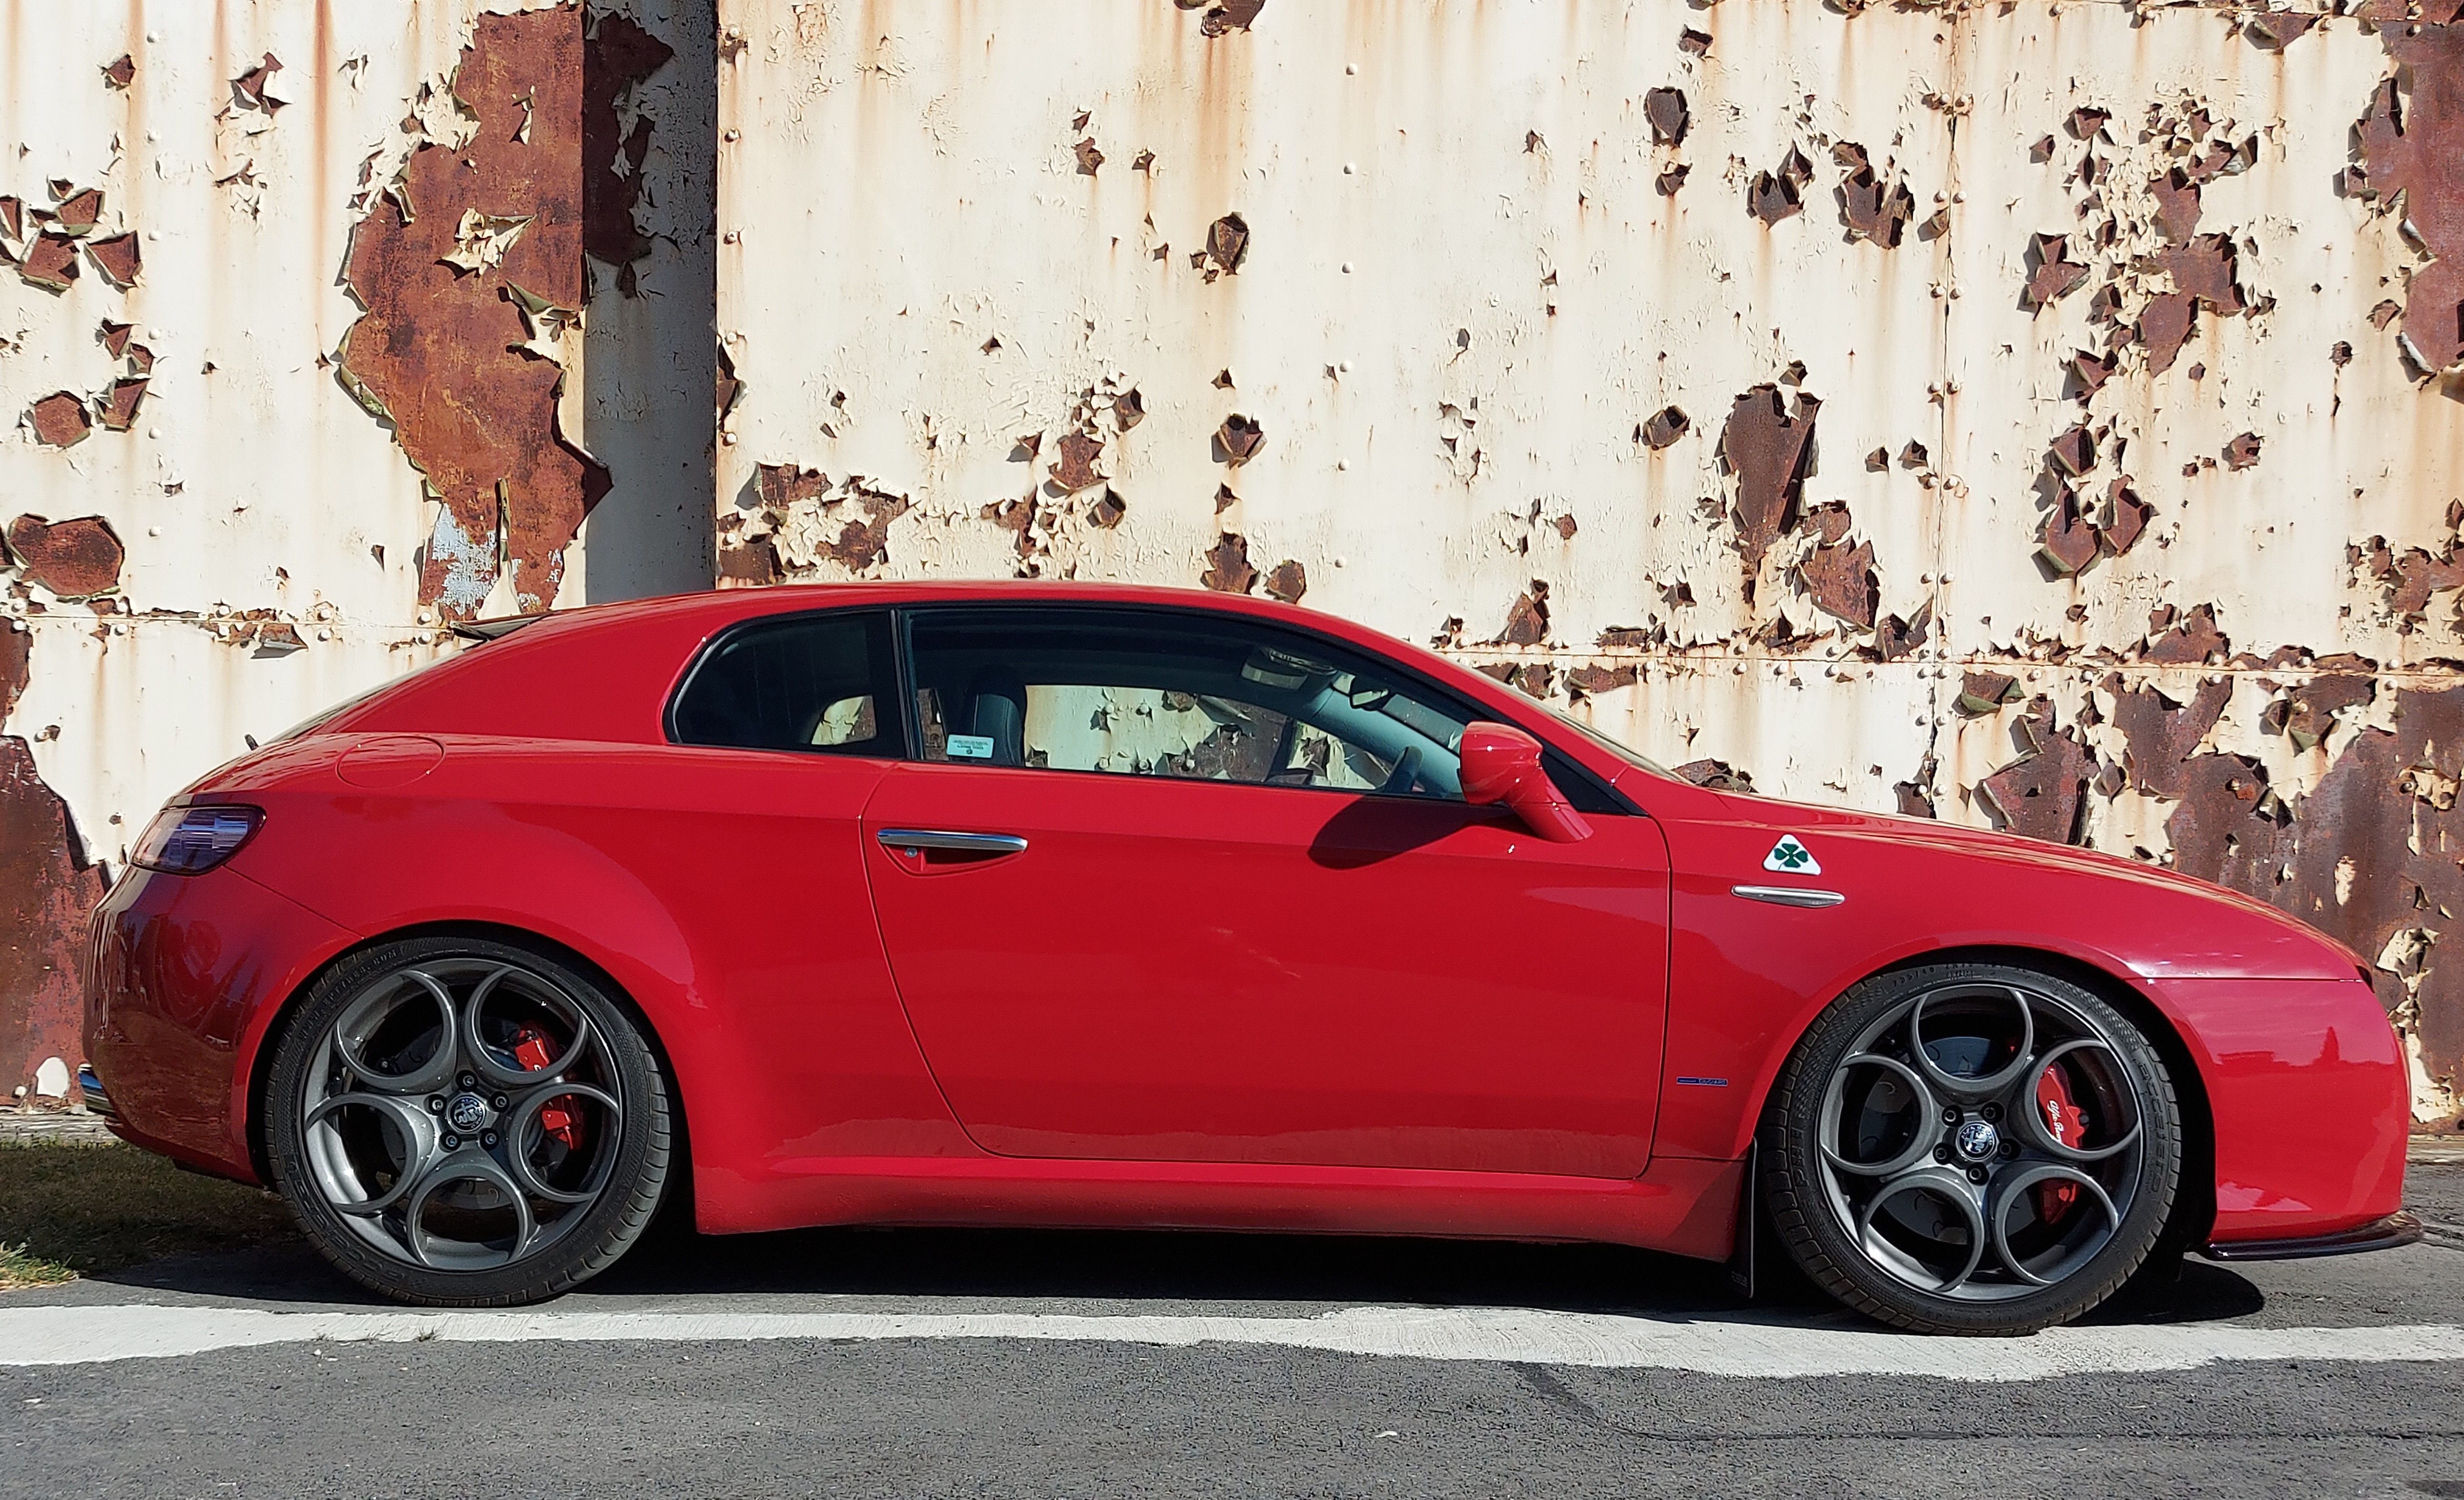
Brera (Type 939) 2005 - 2010
Christopher Wright
Rosso Red
3551

History

I bought the car back in 2008, it was a year old and had 4,000 miles, it'd been used by Alfa Romeo UK as a management car. This was my 5th Alfa, previously having had 2no. 156's, GTV and GT but not my last, I've also got a Stelvio Milano Edition as my daily driver.
My ownership is now in it's 16th year and I have no plans to ever sell the car, I've invested too much time and effort to do the same again.
Originally it was my company car and was for 9 years, as it wasn't garaged the harsh winters had taken their toll and it was time in 2020 to embark on a restoration starting with the front end which was a far greater task that I'd first realised. The extent of corrosion once the arch liners were removed was quite extensive and necessitated major removal of rusted out sections, new metal fabricated and welded (all new skills that I learned whilst doing it). Fortunately or unfortunately depends on your view point I carried it out during COVID which meant I had far more time on my hands and able to do the work. It took me about 4 weeks during July but I was more than happy with the results.
The following year it was time to tackle the rear and underside which again was more work than initially anticipated. I'd already sourced a complete rear subframe with all ancillaries to refurbish over the winter and be ready to attach to the car once all the rust had been removed treated and undersealed.
Due to rust many fixings, brackets etc. were unusable so either sourced good secondhand or new were necessary. Stainless steel fixings used where possible. The subframe and arms were all shotblasted, galvanised and powder coated, bushes replaced with Strongflex where available and all others replaced with OEM. Brakes were upgraded to 4 pot and separate handbrake caliper fitted. This again took 4 weeks in June of 21.
Last major work was to get the car resprayed which was done in 2022 along with refurbishing the front bumper grilles etc.
I've fitted coil overs this year to replace the lowered H & R springs (they were too low) and these have improved the ride quality and handling massively. This is the one car I have owned that I want to retain and it's mainly down to the looks both inside and out, dynamically it's now the car it should have always been, suspension and brakes making the real difference.
The car isn't concourse but is in a very presentable condition but not so you wouldn't us it, now garaged and summer use, always bits to do but nothing major and hopefully will be just maintenance for the near future.
My goal was to refurnish the car but also upgrade to an OEM+. Not radical modification but subtle and functional. Hopefully I've achieved this and I've catalogued in further detail below.
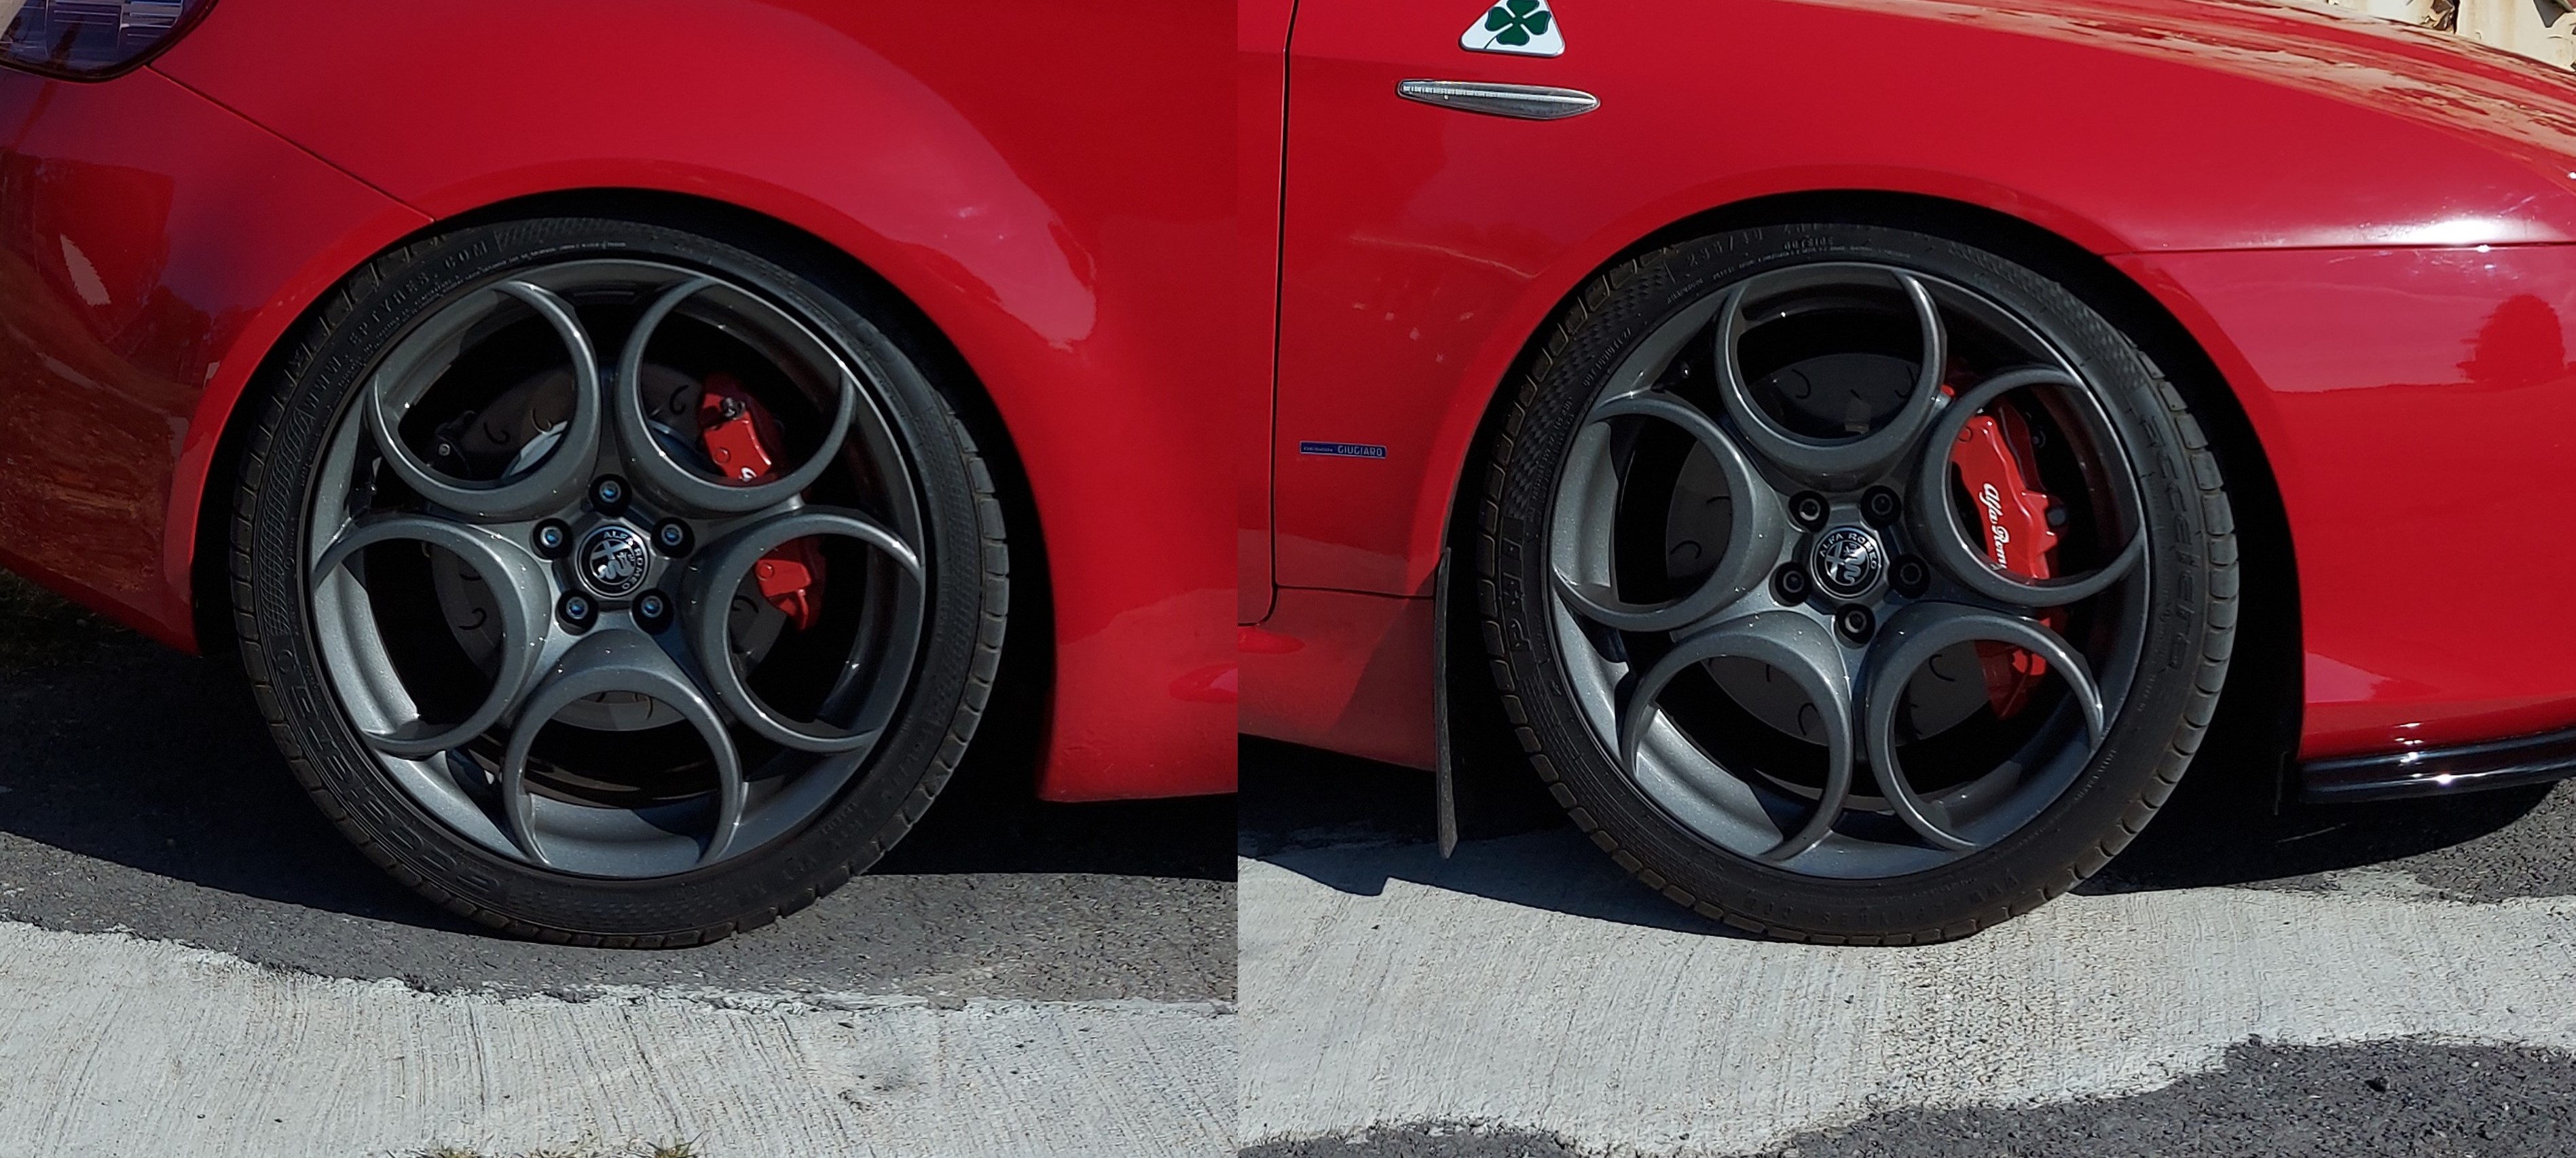
Brake Upgrade
Installed Porsche Cayenne calipers front and rear. 6 pot on front with Mitsubishi Evo X floating discs. Rear are 4 pot with Audi A6 Allroad discs modified to fit.
The calipers fit directly onto the existing upright with minor modification to the Brembo Z18 hole centres (These need to be elongated slightly). Calipers were stripped and repainted along with the obligatory logos and clear lacquered.
Discs were a little more complicated, being 2 piece the bells need to be reversed along with new PCD drilled and center bore enlarged by 1mm. A 3mm wheel spacer was also necessary to allow enough clearance for the wheel to clear the caliper. The spacer being alloy and utilising the disc retaining screw. Longer wheel bolts were necessary although only 5mm longer.
All brake pipes have been changed for Cupro Copper/Nichol alloy as these are stronger than just copper. All bends have been replicated from the original pipes. HEL custom braided hoses used to connect the pipe to the caliper along with stainless steel bleed screws and all fitting.
To replace the handbrake I've used Wilwood MC4 calipers with a custom bracket. Existing cables were long enough but are different lengths on each side and only longer ones would reach so both are the same cable.
Stopping power is transformed and brake pedal feel is as good as original, once I sorted the bleeding out!!
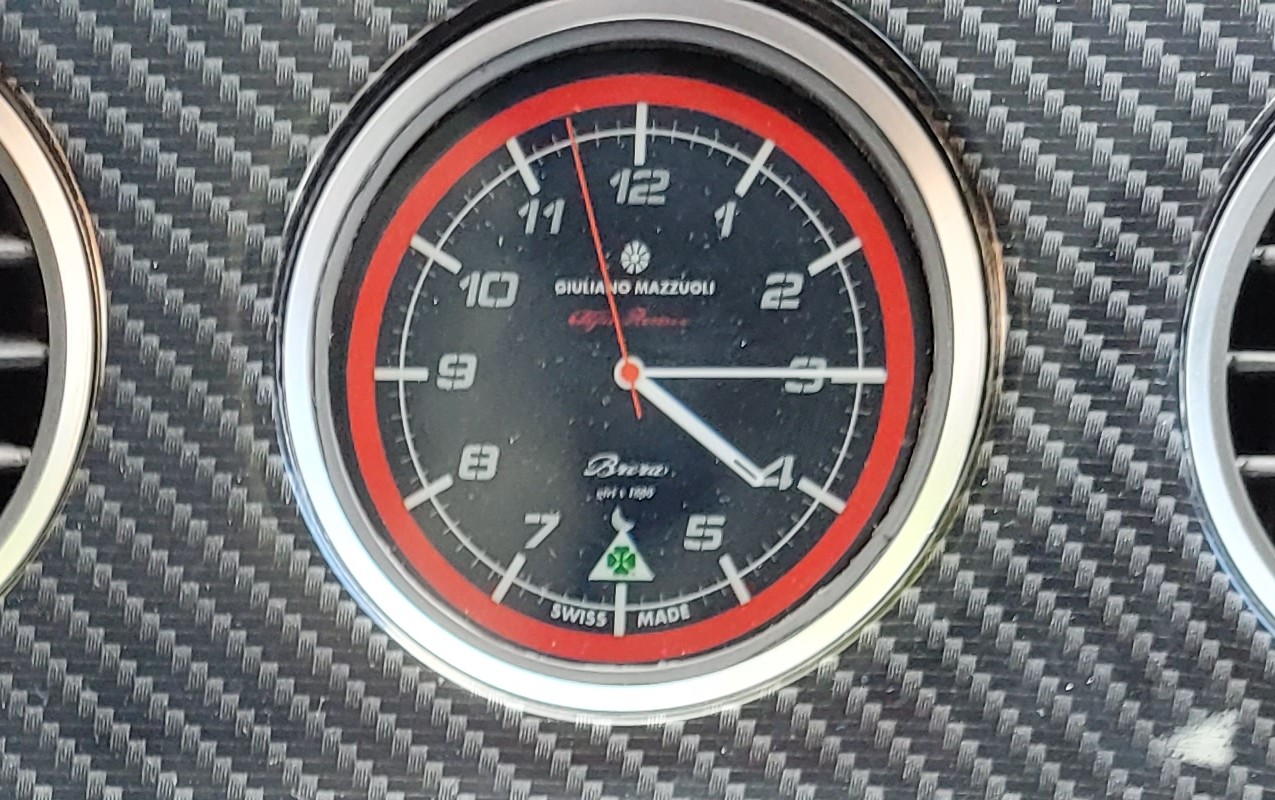
SMART Clock
I liked the idea of a clock in the centre of the dash as Porsche or Maserati. The central vent seemed a perfect location but I also wanted something that would be more useful. Amazon Alexa seemed the right device and reviewing what was available the Amazon Spot looked about right, it has a round touch screen that was the right size.
The dashboard was altered to allow the device to site behind without any need for modification, the void behind accommodating the device which by coincidence is 12v and also has an audio out so this could be integrated with the audio headunit.
I created a custom screen inspired by the gauge clusters and 'Giuliano Mazzuoli' who has done a number of Alfa Romeo watches.
It works as any Amazon device and responds to voice commands.
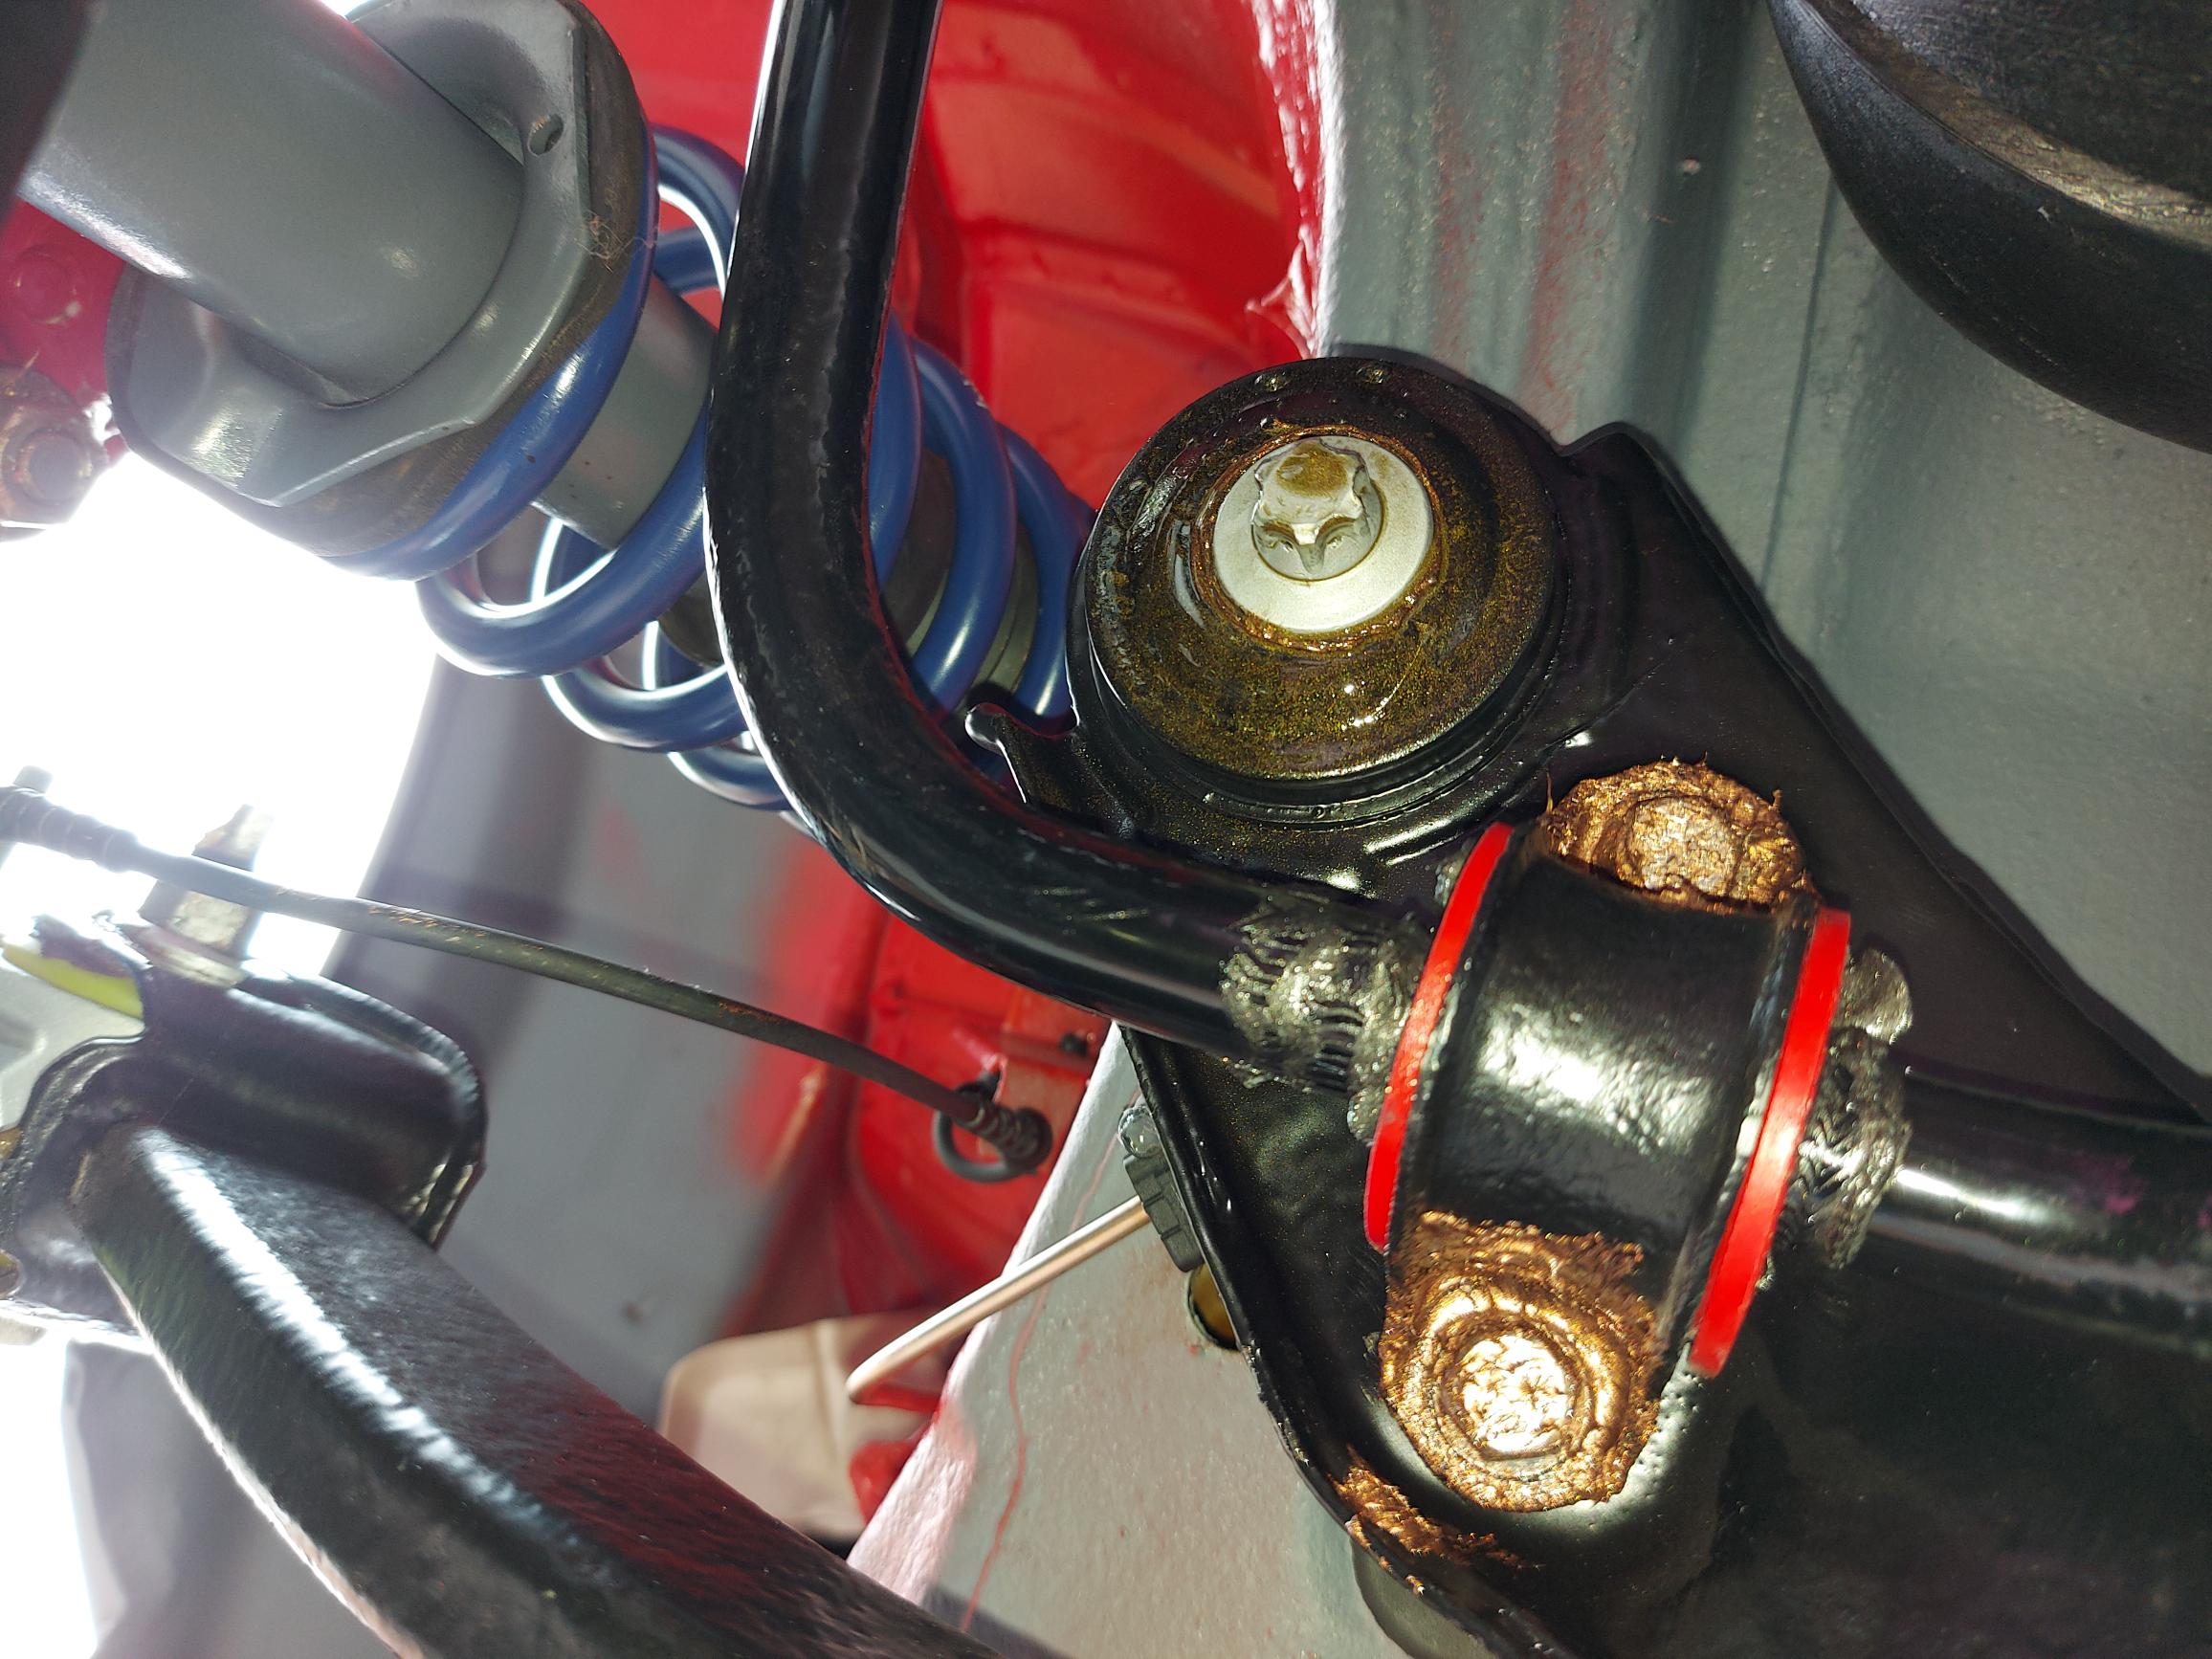
Subframes and Suspension
Subframes on the Brera are prone to rusting and therefore both front and rear have been replaced with fully galvanised and powder coated ones that I sourced and were in really good condition.
The bushes where available have been replaced with Strongflex polyurethane or OEM along with new SFK bearings. All components cleaned painted and replaced with new if damaged.
Steering rack tie roads and track rod ends replaced at the same time to ensure that the steering was as direct as possible.
AP coilovers have transformed the ride which is still compliant but the handling and road holding are on a different level.
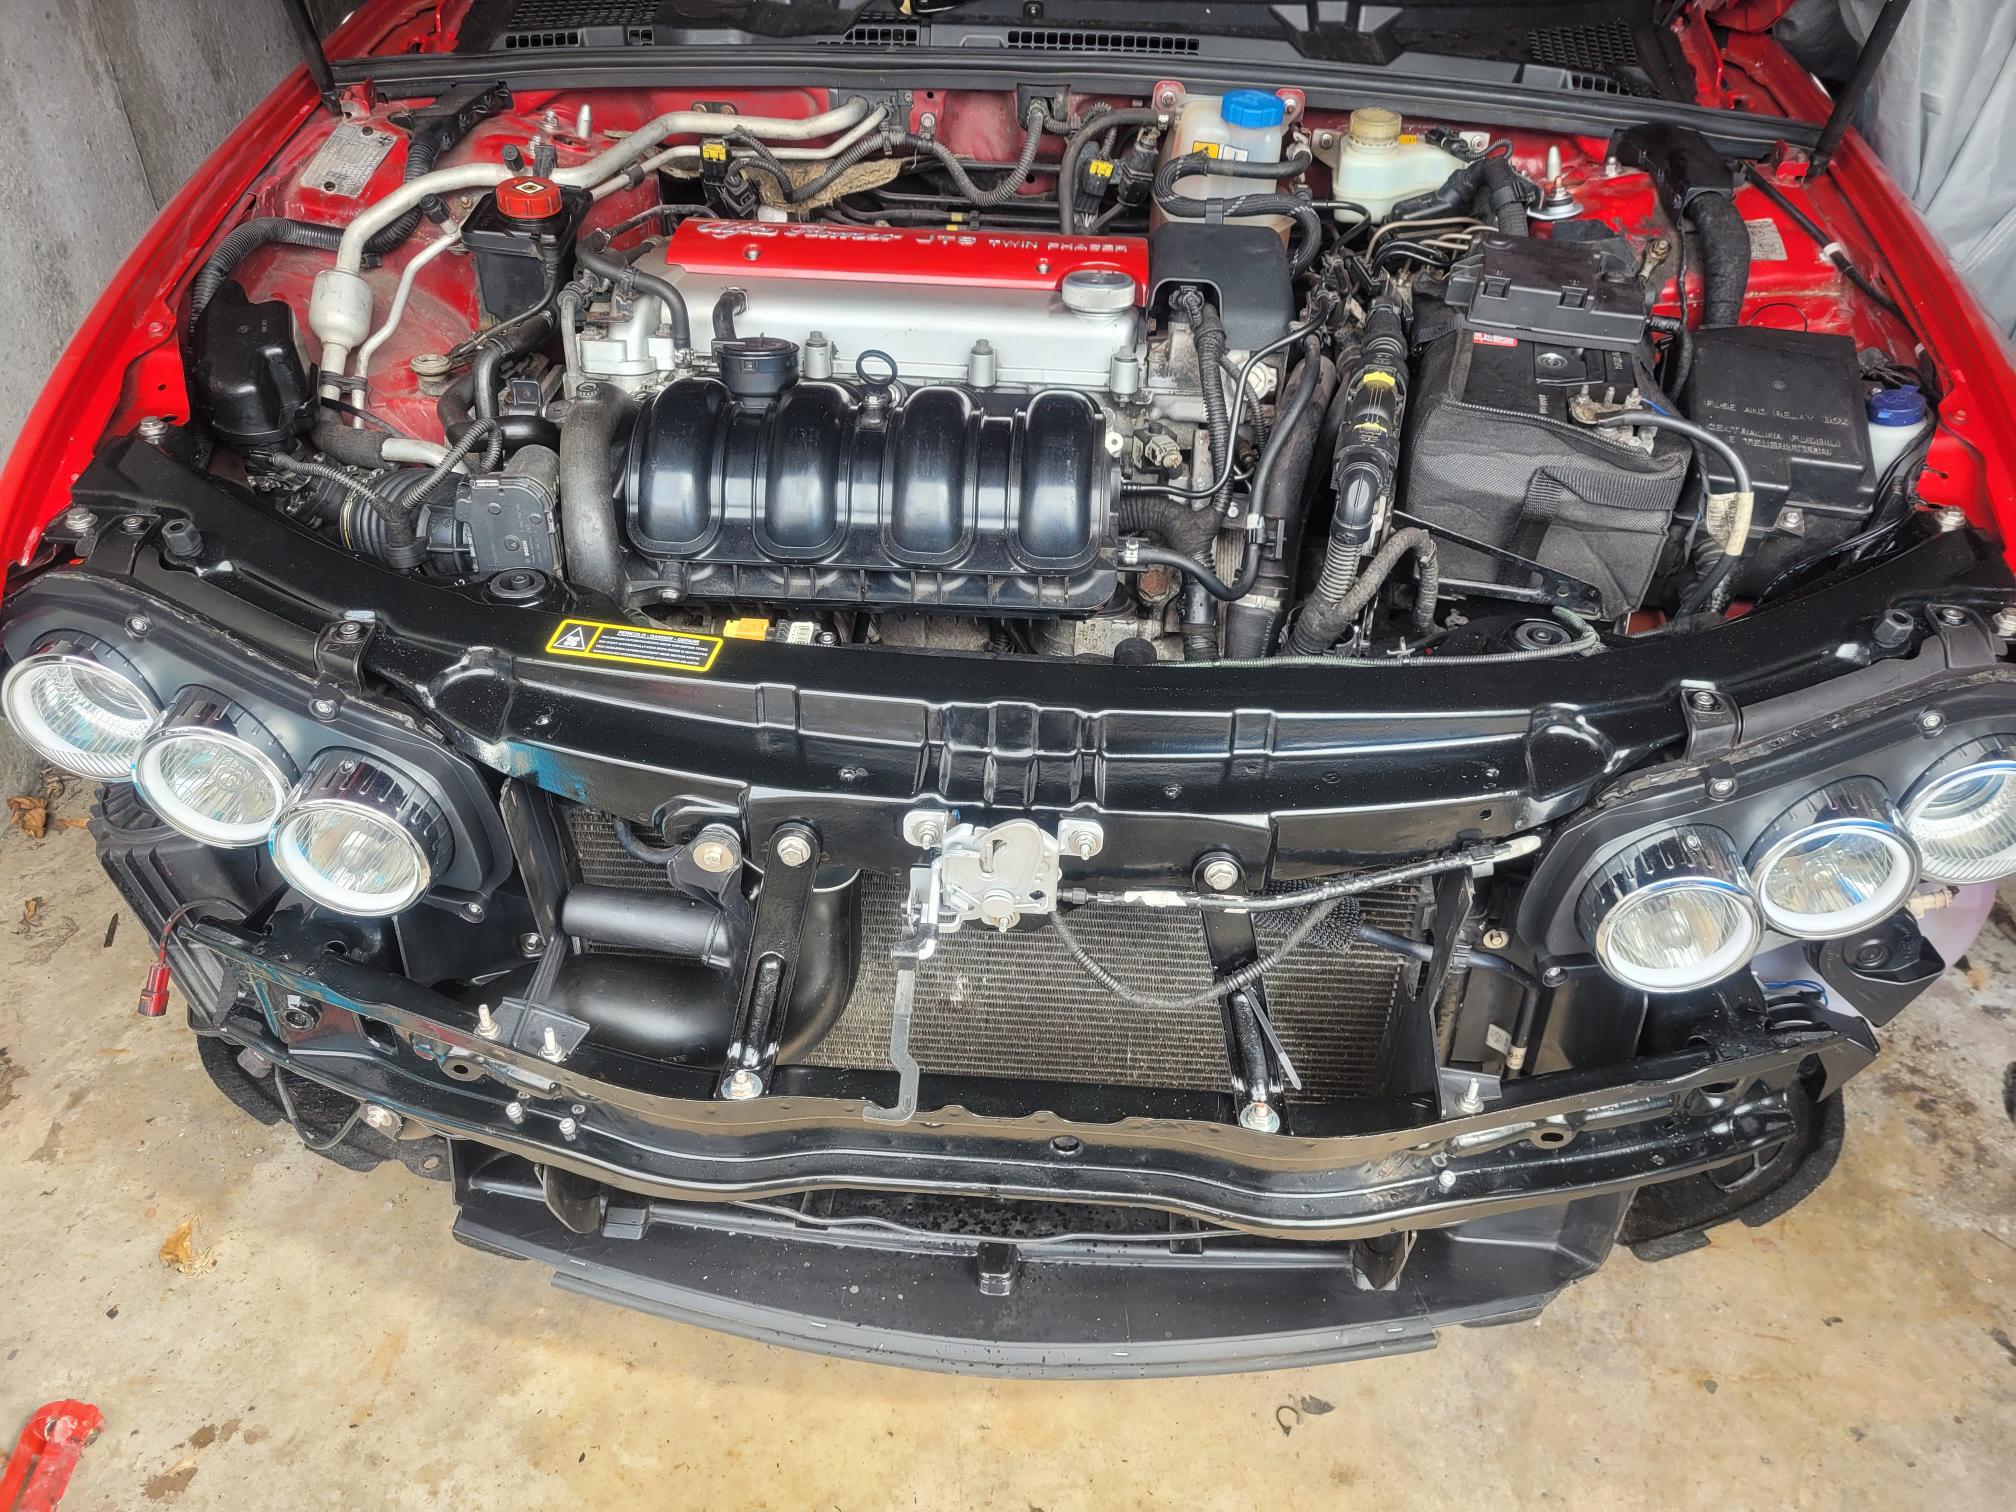
Engine Bay
Slam panel and crash bar although not in bad condition did have some corrosion so these were shot blasted, galvansied and powder coated.
Whilst the bumper was off also refurbish the bonnet latch, horn bracket, alarm bracket and thoroughly cleaned the plastic trims behind the bumper.
New set of decals to finish and put back to original. Nuts and bolts replaced with stainless steel where not structural.
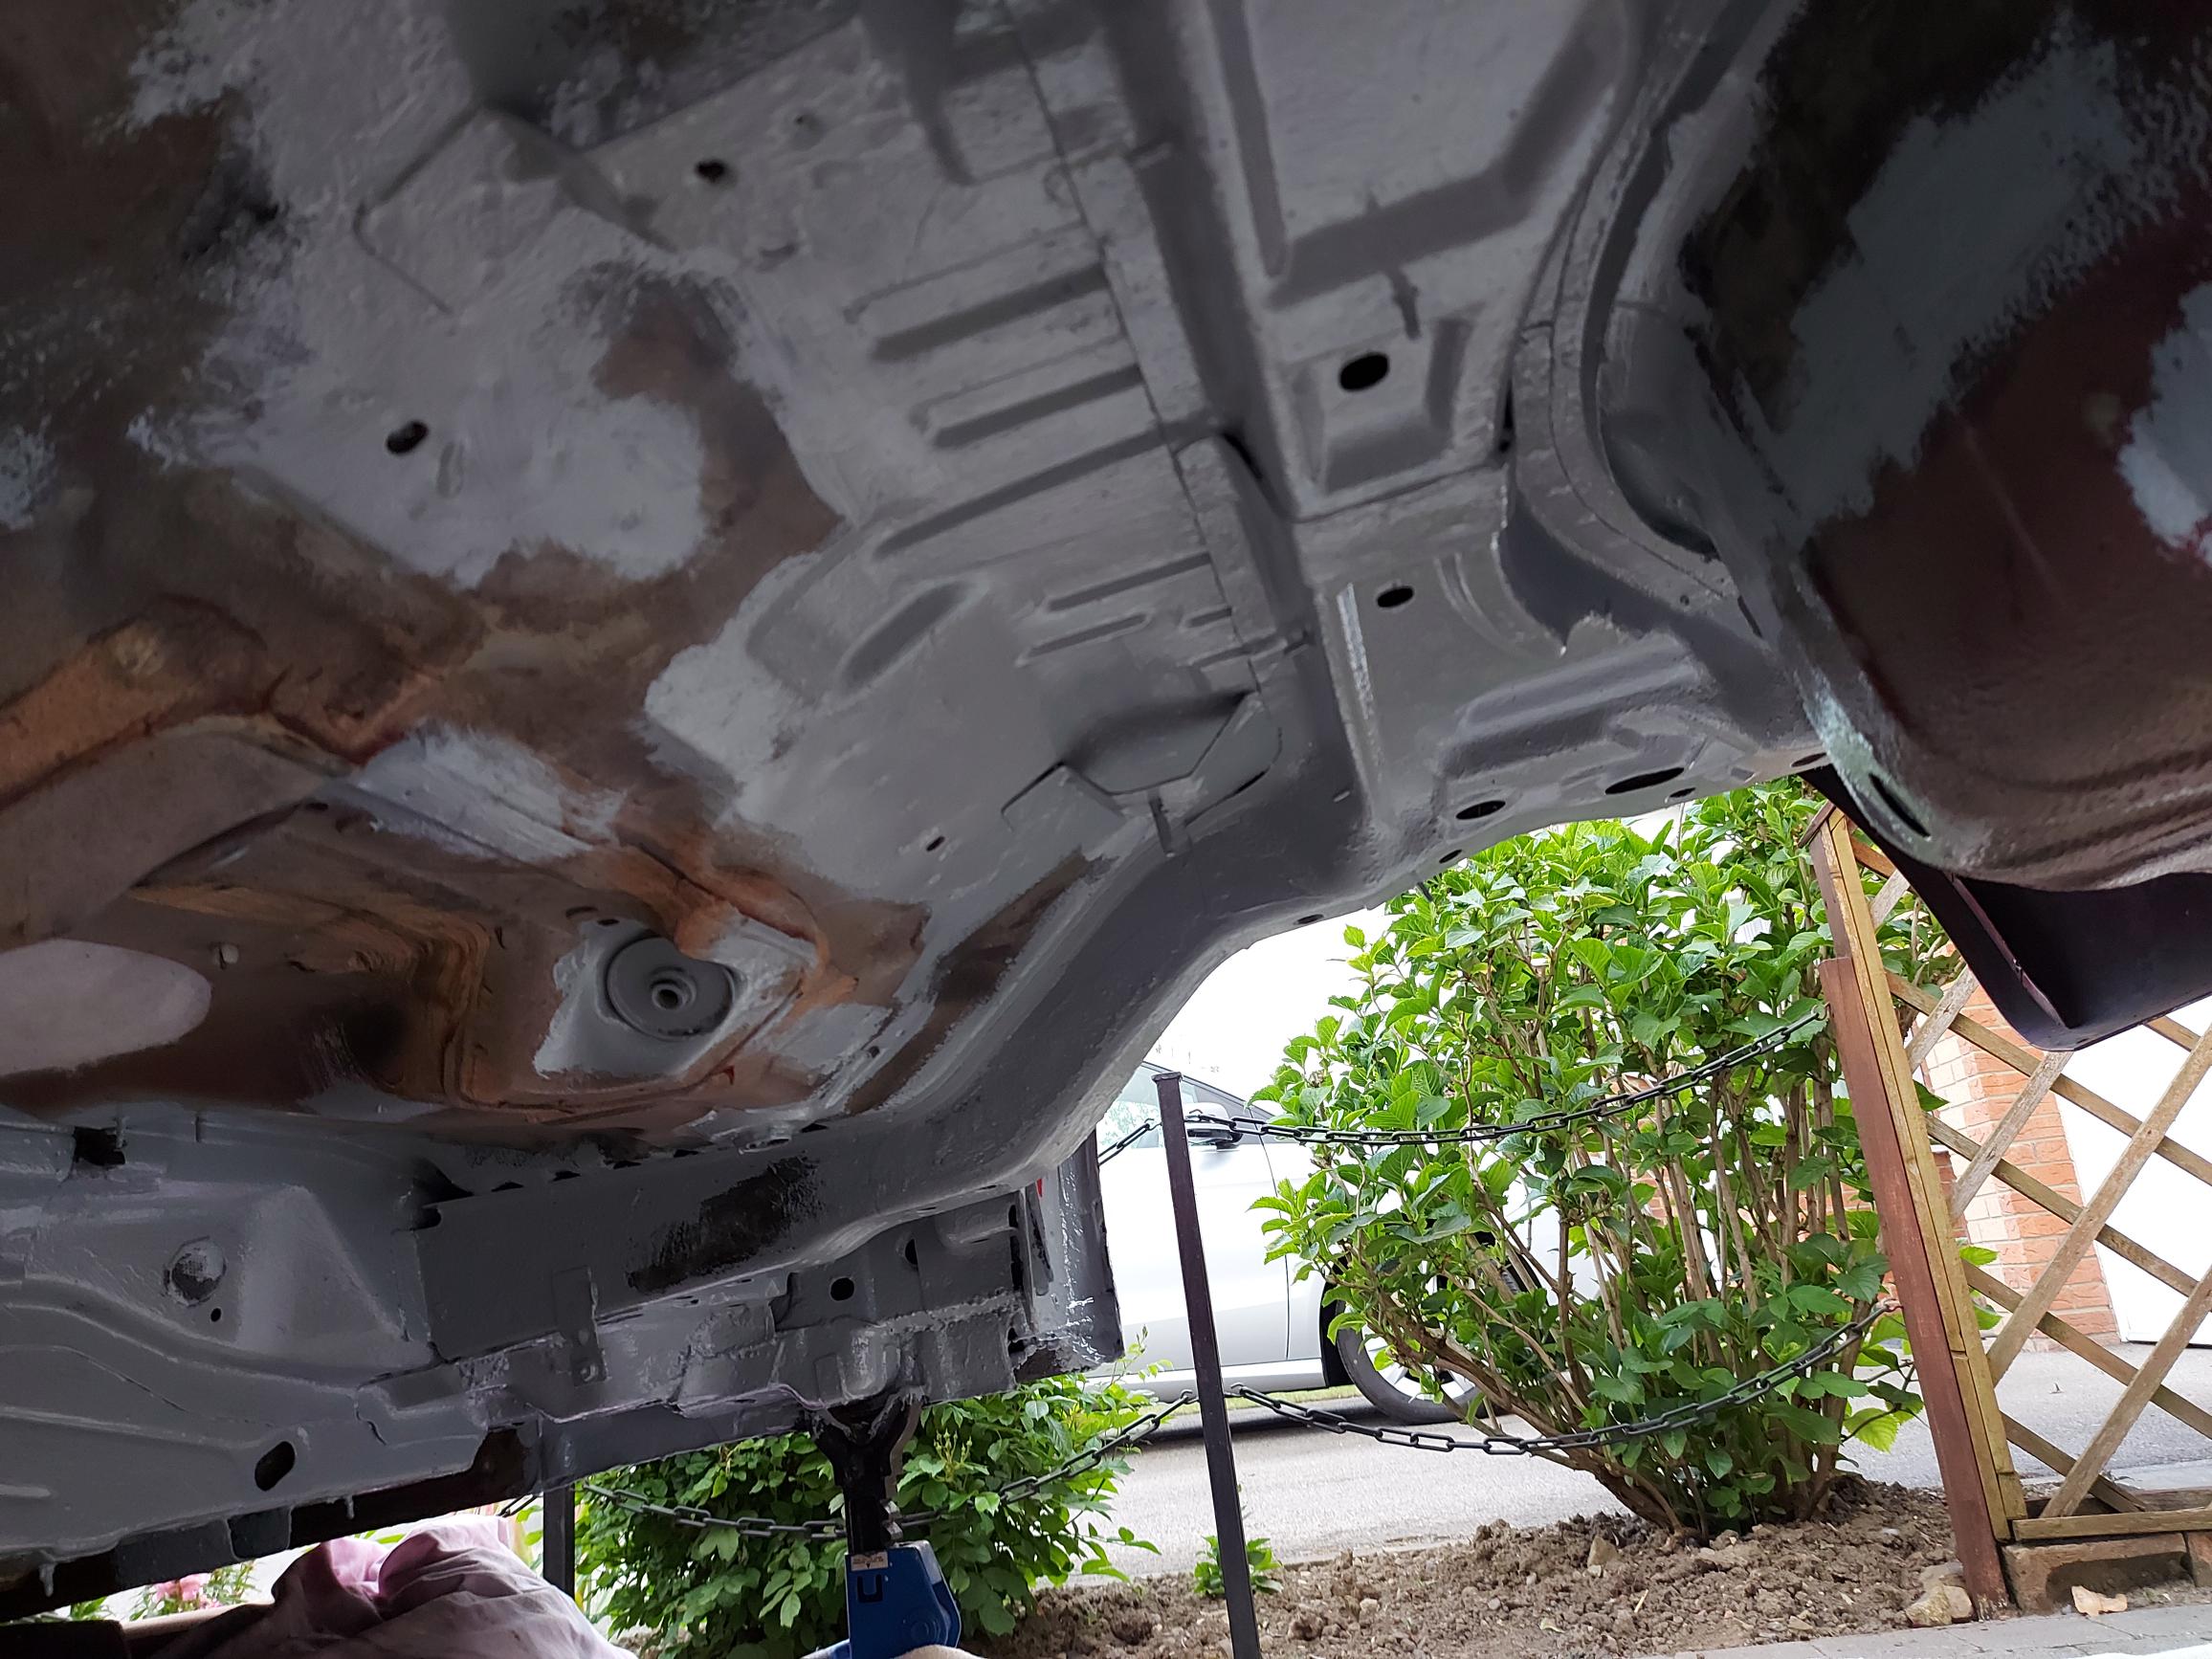
Underside
Rust had taken hold underneath so I decided the strip the complete underside, removing exhaust, subframes and any ancillary items to gain access. The whole of the underside has been stripped of any rust (mainly just surface) and areas treated with rust converter and two coats of epoxy primer before a top coat of Raptor Underseal. All cavities have been treated with Bilt Hamber Dynax S50 to prevent any further corrosion in any inaccessible places.
This did take quite a while and not the easiest to do on my driveway. The result is piece of mind that it's going to last and shouldn't need redoing.
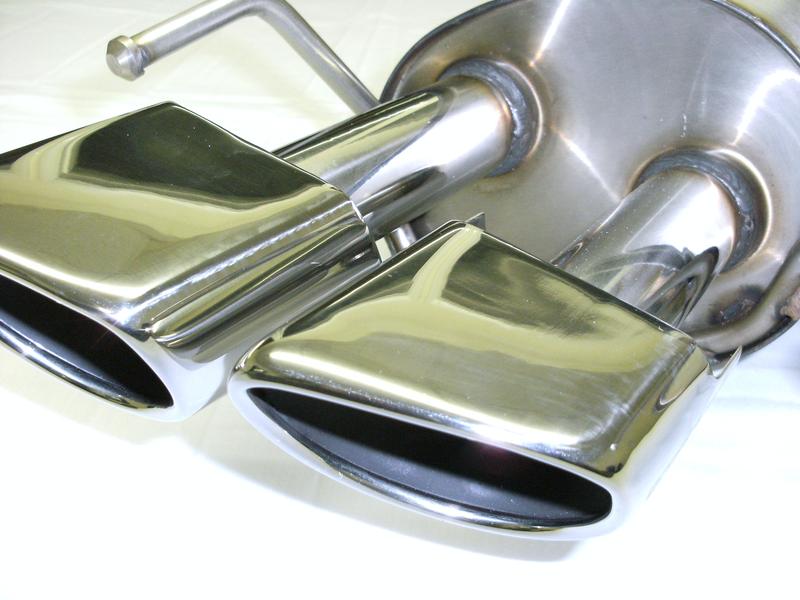
Prodrive Exhaust and System
I purchased the Prodrive exhausts quite a few years ago form Partsworld when they were on offer. They mimic the rear light shape and are just perfect.
However the ravages of time had taken there toll on the rest so I decide the replace the whole system from the cat back. I bought a system from Fox Exhausts in Germany and the quality is fantastic, the steel and welding are first rate.
Front pipes can be purchased from Alfashop, they are a pattern part but good quality, as this is just mild steel I've ceramic coated it and also decide to wrap it with Titanium Exhaust Tape to reduced the heat as this if left contributes the the front subframe rusting which is in close proximity.
Exhaust isn't too loud but does have a nice base note.

Android Heat Unit and Centre Console
Standard Audio just isn't up to modern standards and there's little choice other than to replace it. Good that's it's double DIN as this gives a massive choice of alternatives.
I've gone with a Android Navifly Octacore unit with 4Mb of RAM and 32Mb of storage, this also comes with Android Auto and Car Play build-in. The microphone is in the same place as the original (roof console). The unit allowed a TPMS and Dashcam to be fitted so went with these as well.
To enable the use of Wifi I hotspot my phone for which I've used Samsung Routine to automatically turn it on and off when it connects to the unit with Bluetooth. This is all seamless and needs no intervention.
Centre console and gear surround have been Hydro dipped and has a carbon effect, bezels to the 3 auxiliary gauges and Giulietta gearknob.
Start button has been altered with red button from Guilia/Stelvio QV. Little bit of fabrication but not too complicated.
Rearview mirror has been changed to an auto dimming unit and wired appropriately. Again a nice easy project and a good upgrade.
Footwell lights are red LED and are on whilst ignition is live, these have been fitted into the trim panels under the dashboard, they are not intrusive on a night but do give a red washed effect. To compliment these I've also fitted red LED strips to the door cards just above the door pockets. To complete the lighting the puddle lights now project the 'BRERA' script when opening the door, not to the purists taste but I like the affect.
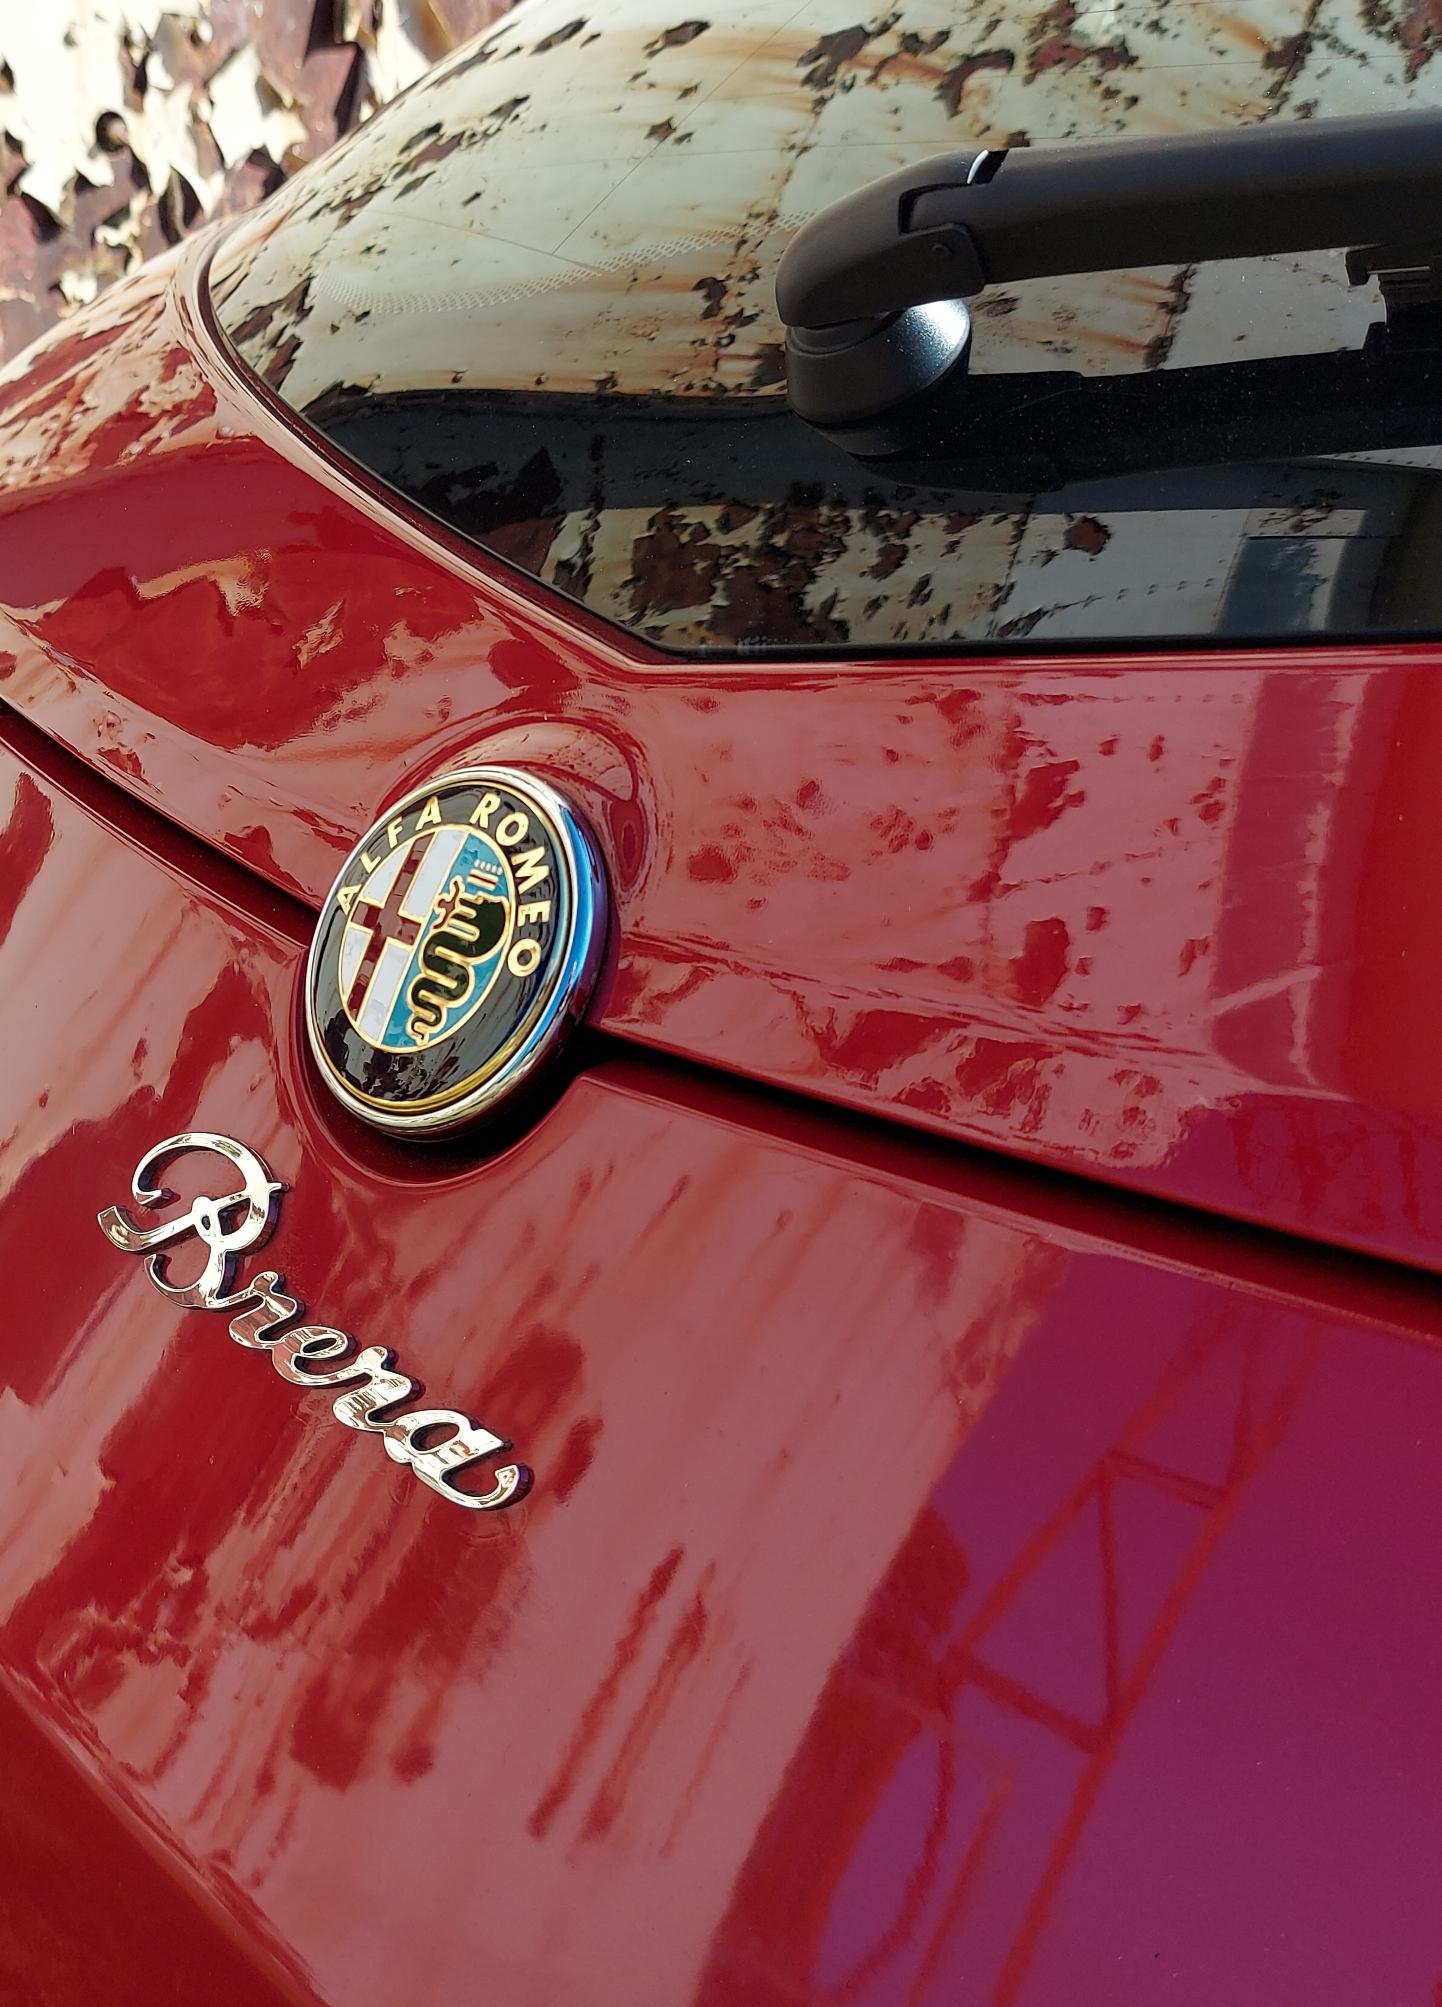
Boot Badge/Release
The MY2008 Brera has a badge that also opens the boot. This I've retrofitted to my car by taking a cable from the button in the arm rest to active the release in the badge switch.
I can now open my boot with the key, badge and button in the arm rest.
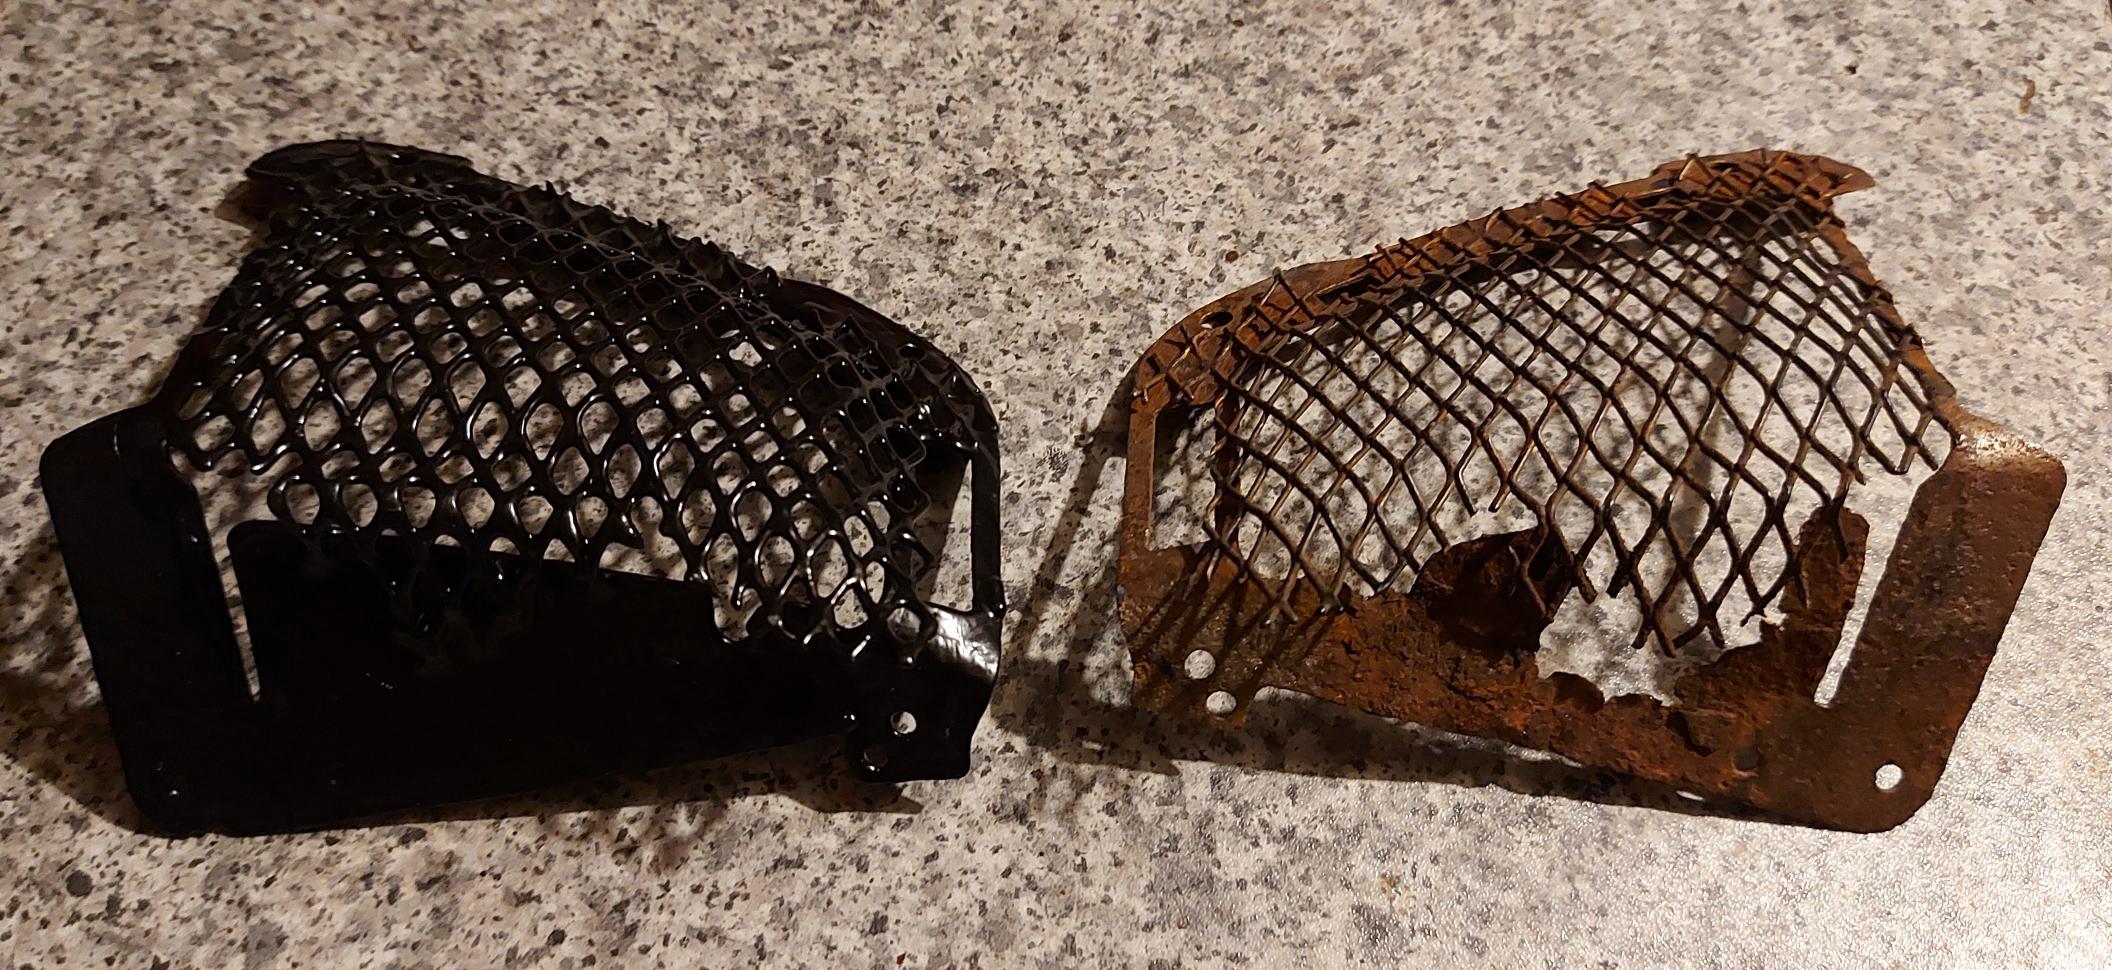
Front Grilles
The grilles to the front bumper are prone to rust and mine were no exception, I hadn't realised how bad until they were removed.
New sections were cut from sheet metal and welding onto the existing, new one's are scarce and very expensive.
These were soaked in white vinegar for a number of days to remove any rust and then treated with rust converter. Painted with POR15 and then sprayed with stain black paint. Hopefully these will now last and won't need any further treatment.
Stainless fixing have been used to secure them to the bumper along with rivnuts to the grille.
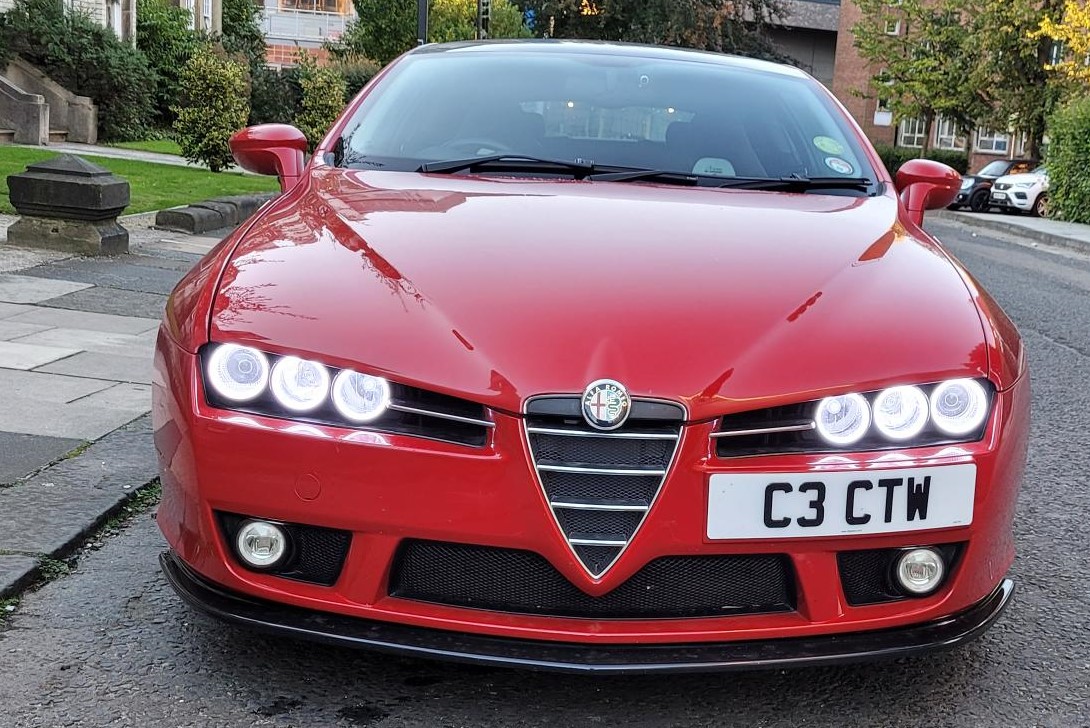
Halo Lights
Headlights are fitted with halo rings and controller is from Powerful UK. Simple operation, turn on when voltage is above 13 volts i.e. when car is running and have a 30 second delay when turned off.
Dim when dipped beam is on and turnoff when indicator is flashing.
The main beam projectors have been changed to Bosch E46-R Bi-Xenon Projectors AL these also allow the main beam to be incorporated into the dipped headlights (Need to run a wire from the main beam to activate the feature). To compliment these I've fitted LED bulbs to the main beam units in the same colour range. Side light bulbs also changed to LED.
Side repeaters have the Led Sequential Blinker Turn Signal units in white as the original.